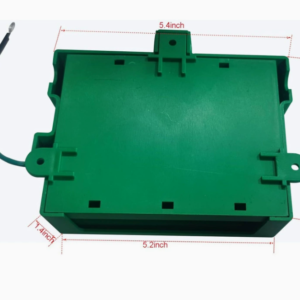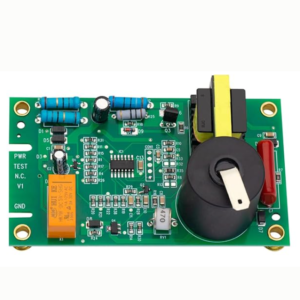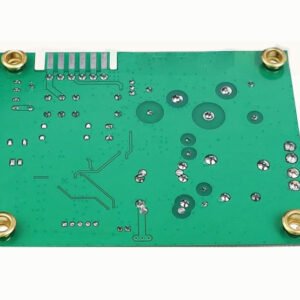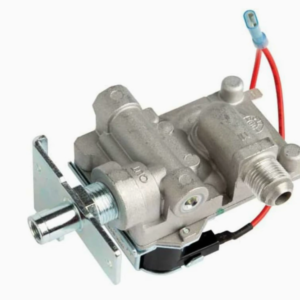
93844 & 93870 Atwood RV Water Heater Gas Valve | 6-10 Gallon No-Hole Replacement
$50.00
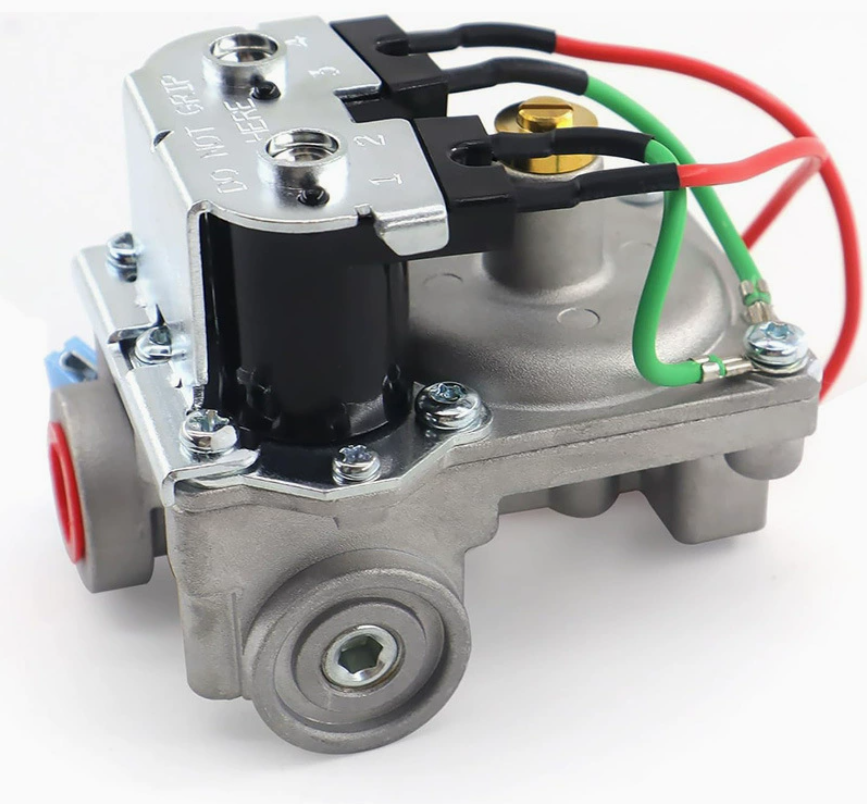
93844 and 93870 gas valve assembly for Atwood 6-10 gallon RV water heaters with no-hole design. Controls propane flow to the burner with integrated solenoid and thermostat. Direct replacement for Atwood GC6AA, G6A-8E, G16-EXT, GC10A. Includes mounting gasket. Free shipping.
Free shipping on orders over $60! Delivery time: 7-12 days
- Satisfaction Guaranteed
- No Hassle Refunds
- Secure Payments
93844 & 93870 Atwood RV Water Heater Gas Valve – 6-10 Gallon No-Hole Replacement
The gas valve assembly is the critical safety and control component that regulates propane flow to your RV water heater burner. It combines the gas solenoid valve (controlled by the ignition board), the thermostat (modulates gas flow based on water temperature), and the manual shutoff in a single assembly. A faulty gas valve can cause no hot water, gas leaks, intermittent heating, or dangerous uncontrolled gas flow.
This 93844 and 93870 gas valve assembly is designed for Atwood 6-10 gallon RV water heaters with the “no-hole” design (no access hole in the water heater door for the gas valve). It features an integrated solenoid, thermostat, and manual shutoff, making it a complete direct replacement.
Compatibility
- Atwood 6-gallon water heaters: GC6AA-10E, GC6AA-9E, G6A-8E, G6A-7E, G6A-6E
- Atwood 10-gallon water heaters: GE16-EXT, GE9-EXT, G16-EXT, GC10A-4E
- Atwood water heaters with “no-hole” gas valve design (no access hole in exterior door)
- Dometic WH-6GA, WH-9GA, WH-10GA water heaters (rebranded Atwood)
- Replaces part numbers: 93844, 93870, 91602, 92834, 93305
- Most Atwood/Dometic 6-10 gallon water heaters with electronic ignition (12V spark)
Kit Contents
- Gas Valve Assembly — integrated solenoid, thermostat, and manual shutoff
- Mounting Gasket — heat-resistant gasket for burner tube seal
- Mounting Hardware — screws and washers
- Installation Instructions — step-by-step guide
Specifications
| Parameter | Specification |
|---|---|
| Part Numbers | 93844, 93870 (replaces 91602, 92834, 93305) |
| Valve Type | Combination gas valve (solenoid + thermostat + manual shutoff) |
| Solenoid Voltage | 12V DC (normally closed) |
| Solenoid Resistance | 10-30 ohms |
| Thermostat Setting | 140°F (60°C) fixed (some models adjustable) |
| Gas Type | Propane / LPG |
| Inlet Pressure | 11″ WC (standard LPG regulator output) |
| Outlet Pressure | Regulated to burner (manifold pressure) |
| Inlet Connection | 3/8″ NPT (female) or 1/2″ NPT (depending on model) |
| Outlet Connection | Mounts directly to burner tube (flange connection) |
| Manual Shutoff | Integral 1/4-turn ball valve (ON/OFF) |
| Water Heater Size | 6-10 gallon |
| Design | No-hole (no access hole in exterior door required) |
| Certification | CSA, AGA, CE, RoHS |
Installation Guide
- Safety first: Turn off propane supply at the tank. Disconnect 12V power at the battery. Allow the water heater to cool completely. Open a hot water faucet to relieve pressure.
- Access the gas valve: Remove the water heater exterior access panel. The gas valve is mounted on the burner tube, visible through the access panel. For “no-hole” models, the valve is accessed entirely from the exterior.
- Disconnect gas line: Place a towel or bucket under the valve to catch residual gas odorant. Disconnect the inlet gas line from the valve using two wrenches (one to hold the valve, one to turn the fitting).
- Disconnect wiring: Unplug the 12V wire connectors from the solenoid coil terminals. Note the wire colors and positions.
- Disconnect thermostat wire: If equipped with an external thermostat wire, disconnect it from the thermostat terminals on the valve.
- Remove old valve: Unscrew the mounting screws holding the gas valve to the burner tube flange. Carefully remove the valve, noting the orientation of the gasket.
- Clean the mounting surface: Use a wire brush or sandpaper to clean the burner tube flange surface. Remove any old gasket material, corrosion, or debris.
- Install new valve: Place the new mounting gasket over the burner tube flange. Position the new gas valve assembly onto the flange, ensuring proper alignment. Secure with the mounting screws, tightening evenly in a crisscross pattern.
- Reconnect gas line: Connect the inlet gas line to the valve using gas-rated Teflon tape (yellow tape) on the threads. Tighten with two wrenches to avoid twisting the valve.
- Reconnect wiring: Plug the 12V wire connectors onto the solenoid coil terminals (polarity doesn’t matter for DC solenoids). Reconnect the thermostat wire if equipped.
- Test for gas leaks: Turn on the propane supply slowly. Apply soapy water to all gas connections (tank valve, regulator, shutoff valve, gas valve inlet). Check for bubbles — any bubbling indicates a leak. If you find a leak, turn off the gas, tighten the connection, and retest. NEVER use a flame to check for gas leaks!
- Test operation: Reconnect 12V power. Turn on the water heater. Verify the ignition sequence: spark ignites → gas valve opens → burner lights → flame is sensed. Let the unit run through at least one complete heating cycle. Check for proper flame (blue with yellow tips, not yellow or sooty). Verify the water temperature rises and the burner cycles off when the set temperature is reached.
Common Symptoms of a Bad Gas Valve
- No hot water — burner never ignites (valve won’t open)
- Clicking sound from the water heater but no flame (solenoid clicks but no gas flow)
- Gas smell near the water heater (dangerous — shut off gas immediately)
- Intermittent hot water — valve sticks open or closed
- Water too hot or not hot enough (thermostat malfunction)
- Burner flame is yellow or sooty (improper gas pressure or blockage)
- Solenoid coil reads open or short on multimeter (should read 10-30 ohms)
- Gas valve manual shutoff is stuck or hard to turn
- Water heater runs continuously without cycling (thermostat stuck open)
- Error code on water heater control board (gas valve fault)
Frequently Asked Questions
Q: How do I test if my gas valve is bad?
A: First, check if the solenoid is receiving 12V power when the water heater calls for heat. Use a multimeter to measure voltage at the solenoid terminals. If 12V is present but you don’t hear a click or smell gas, the valve is likely bad. You can also test the solenoid coil resistance — disconnect the wires and measure across the terminals. A good coil reads 10-30 ohms. An open reading (infinite ohms) means the coil is burned out. If the solenoid clicks but no gas flows, the valve may be mechanically stuck or the gas supply may be off. Always check the propane tank level and tank valve first.
Q: What’s the difference between 93844 and 93870?
A: 93844 and 93870 are similar gas valve assemblies for different Atwood water heater models. The 93844 is typically used in 6-gallon water heaters (GC6AA, G6A-8E), while the 93870 is used in 10-gallon models (GE16-EXT, G16-EXT). Both have the same basic functionality (solenoid + thermostat + manual shutoff) but may differ in thermostat setting, inlet connection size, or mounting flange configuration. This replacement kit is compatible with both part numbers — if your old valve has either number, this assembly will work. Always verify the inlet connection size and mounting flange pattern before installation.
Q: Can I replace just the solenoid coil or do I need the whole valve?
A: In most cases, the gas valve is sold as a complete assembly (valve body + solenoid coil + thermostat + manual shutoff). While the solenoid coil can sometimes be replaced separately, we recommend replacing the complete assembly for several reasons: (1) Gas valves are safety-critical components — a complete replacement ensures all internal parts are in good condition. (2) The thermostat and manual shutoff also wear out over time. (3) Replacing just the coil may not solve the problem if the valve body is stuck or the thermostat is faulty. (4) The complete assembly is cost-effective and includes a new gasket and mounting hardware.
Q: Is it safe to install a gas valve myself?
A: Gas valve installation involves working with propane, which is flammable and can be dangerous if not handled properly. If you are comfortable with: (1) Following detailed safety instructions, (2) Using two wrenches to avoid twisting gas lines, (3) Testing for gas leaks with soapy water, (4) Working with 12V DC electrical connections, then you can likely install this yourself. The most important safety steps are: (1) Always turn off the propane supply before starting. (2) Never use a flame to check for gas leaks — always use soapy water. (3) Ensure all gas connections are tight and leak-free before operating. (4) If you smell gas at any point, turn off the supply, ventilate the area, and do not operate any electrical switches or appliances. If you are uncomfortable with any of these steps, we recommend professional installation by a qualified RV technician or gas fitter.
Related Products
- RV Gas Water Heater Solenoid Valve — 12V gas control valve (standalone solenoid)
- 91367 RV Water Heater Control Board — Replacement control board for Atwood water heaters
- 92089 Water Heater Valve Kit — Water inlet/outlet valves with TPR and drain
Need help repairing your Atwood water heater? Contact our technical team with your water heater model number and symptoms. Free shipping and duties included.
| Weight | 0.5 kg |
|---|
You must be logged in to post a review.


Reviews
There are no reviews yet.