
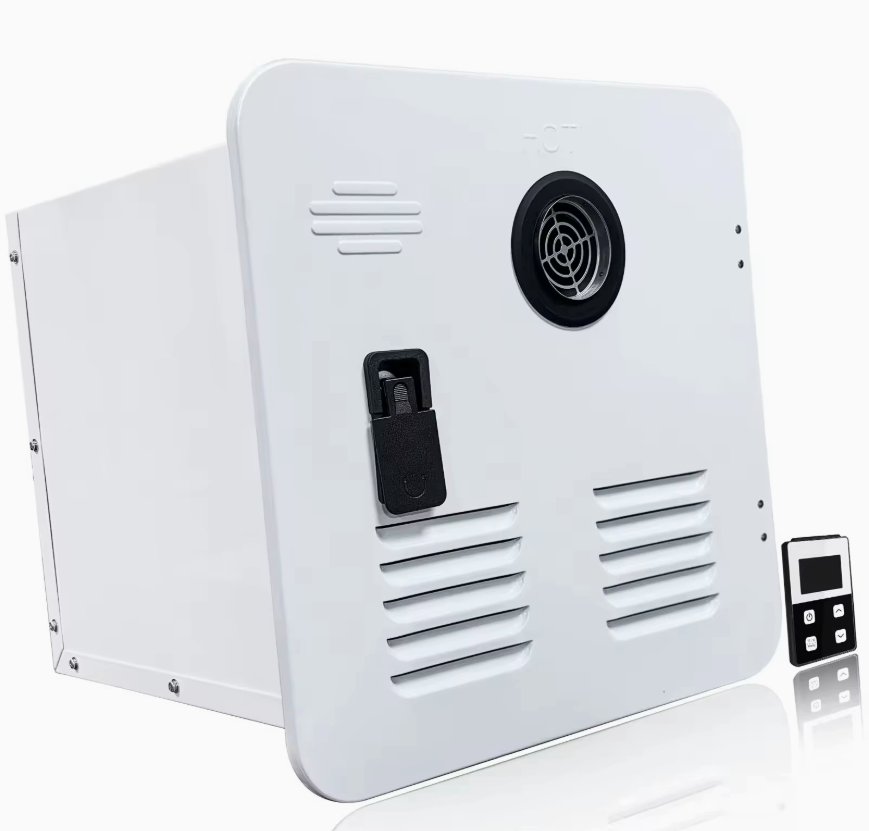
12L Propane RV Water Heater | 12V DC Ignition LPG Gas Hot Water Boiler with Storage Tank
$298.00
12-liter (3.2 gallon) propane LPG RV water heater with 12V DC electronic ignition. Storage tank design for consistent hot water, ideal for RVs, campers, cabins, and tiny homes. Energy-efficient, compact, easy install. Replaces Atwood, Suburban, Dometic 6-gallon units. Free shipping.
Free shipping on orders over $60! Delivery time: 7-12 days
- Satisfaction Guaranteed
- No Hassle Refunds
- Secure Payments
12L Propane RV Water Heater – 12V DC Ignition LPG Gas Hot Water Boiler with Storage Tank
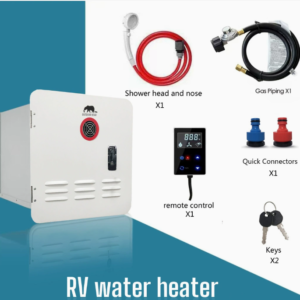
This 12-liter (3.2 US gallon) propane-powered RV water heater provides reliable hot water for showers, dishwashing, and cleaning in your RV, camper, cabin, or tiny home. The storage tank design preheats and stores hot water, ensuring consistent water temperature and pressure even during high-demand use. The 12V DC electronic ignition eliminates the need for a standing pilot light, improving safety and efficiency — the burner only ignites when hot water is needed.
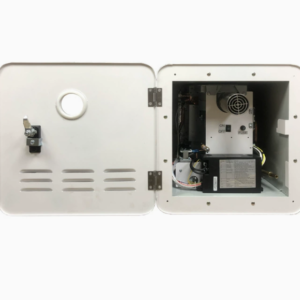
With a 12L capacity, this unit provides more hot water than standard 6-gallon (22L) RV water heaters in a more compact footprint, making it ideal for smaller RVs and installations where space is limited. The unit is designed for exterior mounting with a standard RV water heater door cutout, and can replace most Atwood, Suburban, and Dometic 6-gallon water heaters with minimal modification.
Key Features
- 12L Storage Tank: 3.2-gallon insulated storage tank provides consistent hot water without temperature fluctuations
- Propane / LPG Powered: Runs on standard propane (LPG) — works with 20 lb, 30 lb, and 40 lb tanks
- 12V DC Electronic Ignition: Battery-powered ignition (no standing pilot) — safer and more efficient
- Energy Efficient: Insulated tank reduces standby heat loss; burner only runs when needed
- Compact Design: Fits standard 6-gallon RV water heater cutout — easy replacement installation
- Multiple Safety Features: Overheat protection, pressure relief valve, flame failure device, anti-freeze drain
- Adjustable Temperature: Thermostat adjustable from 30-75°C (86-167°F)
- Corrosion Resistant: Glass-lined steel tank with anode rod for long service life
- Easy Maintenance: Accessible drain plug, replaceable anode rod, and cleanable burner
Specifications
| Parameter | Specification |
|---|---|
| Tank Capacity | 12 liters (3.2 US gallons) |
| Fuel Type | LPG / Propane (butane compatible with conversion) |
| Gas Pressure | 2800 Pa (standard LPG / 11″ WC) |
| Heating Capacity | 16 kW (54,600 BTU/hr) |
| Recovery Rate | ~12 L/hour at 50°C temperature rise |
| Temperature Range | 30-75°C (86-167°F) — adjustable thermostat |
| Ignition Type | 12V DC electronic ignition (spark ignition with flame sensing) |
| Power Supply | 12V DC (for ignition and control) — draws <1A during operation |
| Water Pressure | 0.02-0.6 MPa (3-87 PSI) |
| Water Connections | 1/2″ NPT (inlet & outlet, rear connections) |
| Gas Connection | 1/2″ NPT (inlet, rear connection) |
| Pressure Relief | 150 PSI / 210°F TPR valve (included) |
| Tank Material | Glass-lined carbon steel with magnesium anode rod |
| Insulation | 25mm (1″) polyurethane foam insulation |
| Vent Type | Exterior vented (through RV sidewall, standard door) |
| Cutout Size | 12.75″ × 12.75″ (324 × 324mm) — standard 6-gal RV opening |
| Dimensions | ~16″ × 16″ × 18″ (406 × 406 × 457mm) including jacket |
| Weight | ~28 lbs (12.7 kg) empty |
| Certification | CE, CSA, AGA, RoHS, NSF/ANSI 61 |
Installation Guide
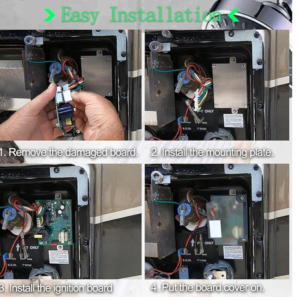
- Prepare the opening: Ensure the RV sidewall has a standard 6-gallon water heater cutout (12.75″ × 12.75″). If replacing an existing water heater, remove the old unit by disconnecting water lines, gas line, and 12V wiring, then remove the mounting screws and slide the unit out. Clean the opening and inspect the wall for any water damage or rot.
- Mount the unit: Apply a bead of butyl tape or silicone sealant around the flange of the new water heater. Slide the unit into the opening from the outside, ensuring the flange sits flush against the sidewall. Secure with the included mounting screws (typically 6-8 screws around the flange). Wipe away any excess sealant.
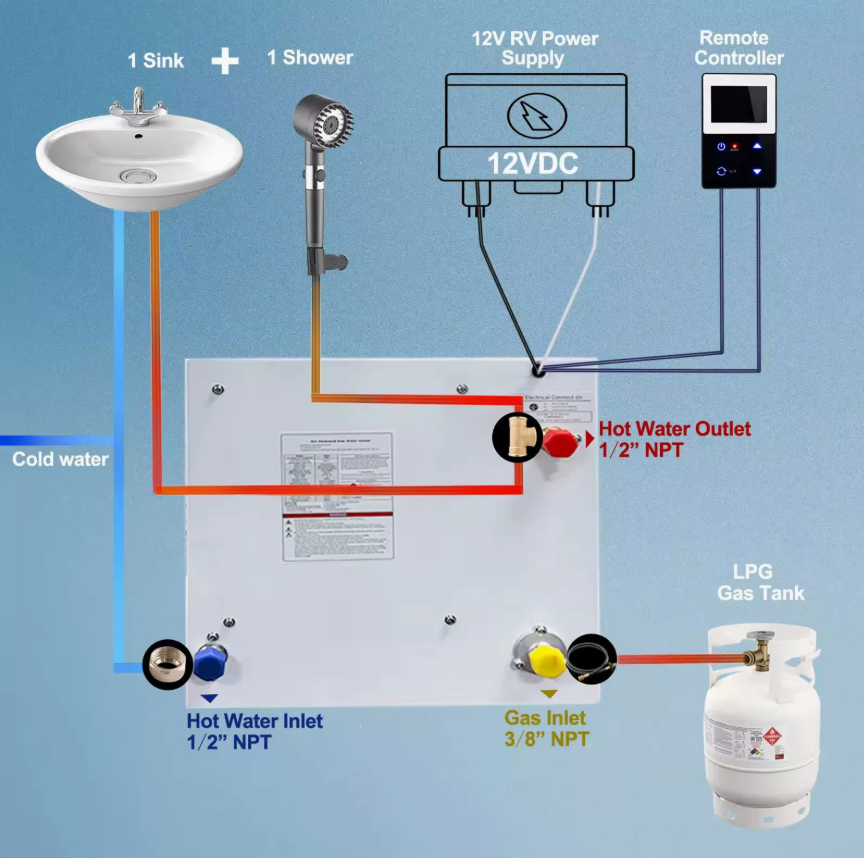
- Connect water lines: From inside the RV, connect the cold water inlet (marked blue, typically bottom left) to the fresh water supply. Connect the hot water outlet (marked red, typically top or bottom right) to the hot water distribution. Use 1/2″ NPT fittings with Teflon tape. Install a shutoff valve on the cold water inlet for easy maintenance. Ensure the pressure relief valve discharge tube is directed downward and away from any heat-sensitive materials.
- Connect gas line: Connect the propane gas supply to the gas inlet on the rear of the unit. Use a gas-rated flexible connector or rigid pipe. Install a shutoff valve on the gas line within easy reach. Ensure all gas connections are tight and properly supported.
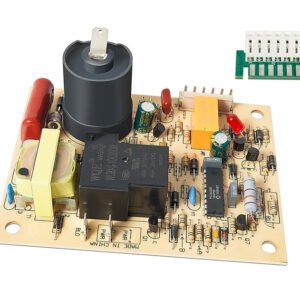
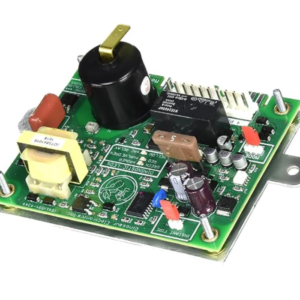
- Connect 12V power: Connect the 12V DC wiring to the water heater’s control board. The unit typically has two wires (red = positive, black = negative). Connect through a dedicated fuse (5A) and an on/off switch inside the RV. Ensure proper wire gauge (minimum 16 AWG). The 12V power is only for the electronic ignition and control — it does not heat the water.
- Fill the tank: Before turning on the gas or power, fill the water heater tank completely. Turn on the fresh water supply. Open a hot water faucet inside the RV to allow air to escape. Let the water run until a steady stream flows from the hot faucet (no sputtering or air). This indicates the tank is full. This is critical — running the burner with an empty or partially filled tank can damage the unit!
- Test for gas leaks: Turn on the propane supply. Apply soapy water to all gas connections (tank valve, regulator, shutoff valve, water heater inlet). Check for bubbles — any bubbling indicates a leak. If you find a leak, turn off the gas, tighten the connection, and retest. NEVER use a flame to check for gas leaks!
- Test operation: Turn on the 12V power switch for the water heater. The unit should automatically ignite (you’ll hear the spark and the burner will light). The burner will run until the water reaches the set temperature, then shut off. Verify:
- The burner ignites within 5-10 seconds of power on
- The flame is blue and stable (not yellow or sooty)
- The water temperature rises (feel the hot water pipe — it should get warm within 5-10 minutes)
- The burner shuts off when the set temperature is reached
- The unit relights when hot water is used and the tank temperature drops
Let the unit run through at least one complete heating cycle (from cold to set temperature) to verify proper operation.
- Install the door: Once the unit is tested and working, install the exterior access door. The door typically snaps or screws into the flange. Ensure the door is properly sealed and the vent openings are clear. The door allows for exterior access to the burner, controls, and drain plug for maintenance.
Safety Features
- Temperature/Pressure Relief (TPR) Valve: Automatically releases water if the temperature exceeds 210°F (99°C) or pressure exceeds 150 PSI, preventing tank rupture. The discharge tube must be directed downward and away from people and property.
- Flame Failure Device (FFD): If the burner flame goes out (due to wind, gas interruption, etc.), the thermocouple or flame sensor automatically shuts off the gas supply within seconds, preventing unburned gas from accumulating.
- Overheat Thermostat: A high-limit thermostat shuts down the burner if the water temperature exceeds safe limits (typically 85°C / 185°F), even if the main thermostat fails. This is a secondary safety protection.
- Anode Rod: A magnesium anode rod is installed in the tank to attract corrosion, protecting the steel tank from rust. The anode rod should be inspected annually and replaced when 75% consumed.
- Insulated Tank: 1″ (25mm) of polyurethane foam insulation reduces standby heat loss and prevents the exterior jacket from becoming hot to the touch, reducing burn risk.
- Pressure Regulator: The unit is designed to operate at standard RV water pressure (30-60 PSI). If your incoming water pressure exceeds 80 PSI, install a pressure regulator to prevent damage to the tank and fittings.
Maintenance Schedule
| Interval | Maintenance Task |
|---|---|
| Monthly | Test TPR valve by lifting the lever briefly (water should discharge). Check for water leaks around the unit. Inspect the exterior door seal. |
| Every 3-6 Months | Drain and flush the tank to remove sediment buildup. Clean the burner assembly and air intake. Check the anode rod condition. |
| Annually | Replace the anode rod if 75% consumed. Inspect and clean the flue/vent. Test all safety devices. Check gas lines for leaks. Inspect the tank for signs of corrosion. |
| Every 2-3 Years | Replace the TPR valve (safety devices degrade over time). Replace the gas valve if showing signs of wear. Consider descaling the tank if you have hard water. |
| Before Winter Storage | Drain the tank completely. Bypass the water heater and add RV antifreeze to the plumbing lines. Leave the drain plug open during storage (or install a bypass kit). |
Frequently Asked Questions
Q: How long does it take to heat a full tank of water?
A: The heating time depends on the starting water temperature and the set temperature. From a cold start (60°F / 15°C) to a typical set temperature of 120°F (49°C), the 12L tank with a 16 kW burner will heat in approximately 10-15 minutes. From a warmer starting temperature (70°F / 21°C), it will heat in 8-12 minutes. The recovery rate (how fast it reheats after hot water is used) is approximately 12 liters per hour at a 50°C temperature rise. This means you can continuously use about 12L of hot water per hour without the temperature dropping significantly. For a typical shower (6-8 L/min), you have about 1.5-2 minutes of hot water before the tank is depleted, then the burner will reheat the incoming water as you continue.
Q: Can I use this with natural gas instead of propane?
A: This unit is configured for LPG (propane) use. Using it with natural gas requires a conversion kit that changes the gas orifice size and regulator pressure. Natural gas operates at a lower pressure (4-7″ WC) than propane (11″ WC) and has a different energy content per cubic foot. We do not recommend attempting a DIY conversion — contact a qualified gas technician or the manufacturer for a proper conversion kit. Using the wrong gas type can cause dangerous operating conditions including sooty flames, carbon monoxide production, incomplete combustion, and gas leaks. Always use the fuel type specified on the unit’s rating plate.
Q: How do I winterize this water heater?
A: To winterize the water heater for freezing temperatures: (1) Turn off the 12V power and gas supply to the water heater. (2) Turn off the fresh water supply. (3) Open a hot water faucet inside the RV to relieve pressure. (4) Remove the drain plug from the bottom of the water heater (accessible through the exterior door). Attach a hose if desired to direct the water away. (5) Open the TPR valve (lift the lever) to allow air into the tank, which speeds up draining. (6) Once the tank is completely drained, close the TPR valve and reinstall the drain plug (hand-tight only). (7) If your RV has a water heater bypass kit, set the valves to bypass mode (this prevents antifreeze from filling the water heater tank). (8) Add RV-specific antifreeze (non-toxic, propylene glycol-based) to the fresh water system by either pouring it into the tank and running the pump, or using a hand pump at the city water inlet. Run antifreeze through all hot and cold faucets until you see pink liquid. (9) During storage, leave the water heater bypassed and drained. Do NOT put antifreeze inside the water heater tank — it’s not necessary and can be difficult to fully flush out in spring. NEVER use automotive antifreeze (ethylene glycol) in a potable water system — it is toxic!
Q: What’s the difference between storage tank and tankless water heaters?
A: Storage tank water heaters (like this 12L unit) heat and store a fixed amount of water in an insulated tank. They provide hot water immediately when you turn on the faucet, but you can run out of hot water if you use more than the tank’s capacity. They are simpler, less expensive, and more tolerant of low water pressure. Tankless (on-demand) water heaters heat water instantly as it flows through the unit, without a storage tank. They provide endless hot water (as long as gas and water are available) and are more energy-efficient, but they have a maximum flow rate and require a minimum water flow to ignite. For RV use, storage tank heaters are more common because they: (1) Work well with low water pressure and small water pumps, (2) Provide consistent temperature even with fluctuating flow, (3) Are simpler to install and maintain, (4) Fit standard RV wall cutouts. The 12L capacity of this unit is a good balance between compact size and sufficient hot water for 1-2 people.
Related Products
- Outdoor LPG Tankless Water Heater — Instant tankless hot water for outdoor use
- 6kW LPG Combi Air & Water Heater — Truma Combi 6E replacement combi boiler (space + water heating)
- 92089 Water Heater Valve Kit — RV water heater valve kit with TPR valve and drain valve
Need help choosing the right water heater for your RV or cabin? Contact our technical team with your requirements and installation space. Free shipping and duties included on all orders.
| Weight | 16 kg |
|---|
You must be logged in to post a review.
Reviews
There are no reviews yet.